The Third Moon (第三の月) is the final stage in Strider 2, an updated rendition of the original stage. The stage's official full name is "Terminate the Grand Master" (グランドマスター抹殺).
Story[]
New Life Laboratory
Standing high above in the Earth's satellite orbit, the Third Moon is a massive space station presumably built by Light Sword Cypher, serving as the enemy headquarters[2]. From within this station, Grandmaster Meio rules over the Earth and experiments on the lifeforms he has created. His greatest creation is the Caduceus, a monstrous bio-organic weapon he refers to as the "Path to the Stars"[3], a vehicle for him to abandon Earth and travel the galaxy.
After the destruction of the Flying Battleship Balrog, Hiryu took down Admiral Wilhelm and commandeered his escape ship, using it to reach the Third Moon. Defeating Solo for the final time, Hiryu infiltrates the station and eventually finds and destroys its Gravity Core. On his way to meet Grandmaster Meio, Hiryu is confronted by Hien, now ready to fight him with all his might. The two Striders face off and Hiryu comes out victorious.
Once reaching the station's control section, Hiryu is faced by Grandmaster Meio as he proclaims he'll take care of Hiryu before destroying Earth. In the end Hiryu eliminates both Meio and Caduceus just before the Third Moon explodes violently, presumably from the damage it sustained during battle and the loss of its core.
Layout[]
The Third Moon Spaceport (ザ・サードムーン宇宙港)
Known as "The Spaceport of the Third Moon" in the English script.
Hiryu's entry point into the station, the spaceport is affected by a "zero gravity" effect: Hiryu can move unaffected, but his jumps makes him fly all the way up until reaching another surface (where he then stands up as in reverse gravity), and he can change directions mid-flight by double jumping, which makes him descend down. Right from the start, Hiryu is confronted by Solo and a team of his mass-produced clones. After defeating him, there's a set of narrow passages heavily defended by plasma-wielding Space Infantrymen, bouncing machines and tri-way laser cannons. This path leads around the port into a long beam overlooking a large spacious area.
This final area has a three-level structure leading into the exit, but giant explosive containers continously come from the top and float all around it. They explode upon touch, sending Hiryu flying away, and are hard to destroy, so it's better to find a way around them to reach the exit door on the platform at the bottom.
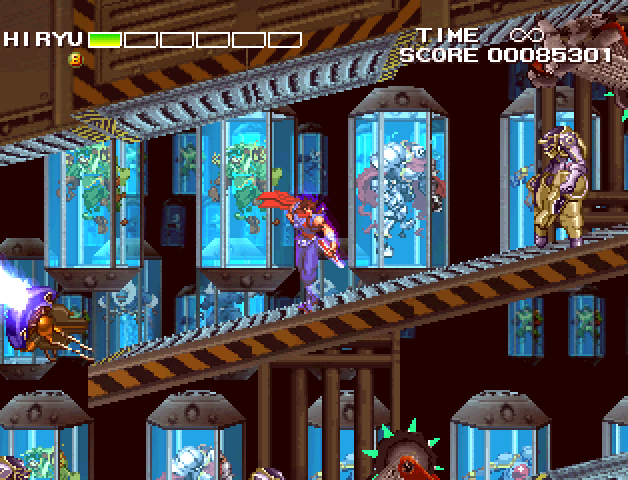
New Life Development Section (新生命開発セクション)
Known as "The new bio development section" in the English script.
A giant research laboratory with several tubes lining its walls, showcasing human enemies from all previous stages, the lifeforms or "children" created by Meio. The area is a straight corridor that ends in an ascending shaft leading to the next section, with plenty of Space Infantrymen and machines roaming it. At fixed intervals the sound of an alarm will indicate a gravity switch affecting the whole area: parts of the floor will raise or descend and the whole area will change gravity, forcing Hiryu to walk on the ceiling until the gravity shifts back to normal.
The enemies seen inside tubes are, in order of appearance: green Fortress Guards, Armored Guards, Tianhou Troops, Balrog Infantry men, Antarctic Guards (both fat and muscle versions), Commando Troops, Assassins and tall Researchers.
Gravity Control Unit (重力制御装置)
Known as "The gravity control device area" in the English script.
A second Gravity Core, identical to the Gravity Experimental Unit found in the Antarctica Research Lab. This core is found in an identical gyroscope-like room, and attacks exactly the same as the first one.
Central Entrance (中央エントランス)
A large bottomless area that leads into the Grandmaster's main chambers. Similar to the original's Ouroboros run, Meio can only be reached by riding the Beraenavis into the top. At the beginning of the area, and while the Beraenavis is flying upwards, Hien jumps down and challenges Hiryu to their final fight.
Unified Earth Control Section (地球包括管制セクション)
Known as "The control section" in the English script.
The main control room from where Grandmaster Meio rules the entirety of the world. This room is two-tiered and has two branching platforms at each side, containing Item Boxes, and several holographic screens floating all around. The background has a large mirror into space from where the Earth can be seen.
Meio awaits at the central circular platform, teleporting out after threatening Hiryu and starting the boss fight.
Throne of the New God (新たなる神の玉座)
Known as "The throne room" in the English script.
An exterior area overlooking Earth, located at the top of the Third Moon. Apparently damaged during Hiryu's battle with the Grandmaster, the area is a single, long platform standing over and around several beams that were once part of the Third Moon's structure. In this location, Hiryu faces the giant Caduceus as a weakened Meio observes. Following its destruction, Hiryu approaches and terminates the Grandmaster with a single slash, finishing his mission.
Stage Enemies[]
Enemies present in this stage include:
- Solo (Scene 1 Boss)
- Solo Mass Produced Model (Scene 1)
- Space Infantryman (Scenes 1 and 2)
- Cracker Snail (Scene 1)
- Hawk Moth (Scene 1)
- Horsefly (Scene 1)
- Swallowtail (Scene 1)
- Tadpole (Scene 2)
- Roller Spider (Scene 2)
- Gravity Core (Scene 3 Boss)
- Beraenavis (Scene 4)
- Strider Hien (Scene 4 Boss)
- Grandmaster Meio (Scene 5 Boss)
- Gravity Organism Graveleo (Meio Summon)
- Plasma Organism Ardoravis (Meio Summon)
- Electromagnetic Organism Fulmenorca (Meio Summon)
- Caduceus (Scene 6 Boss)
Hidden Items[]
A listing of locations for all known hidden Score Up items in this stage.
| Scene 1 Locations | ||
|---|---|---|
| Order | Hidden Item | Information |
| #1 |  |
In the last area with the floating containers, go right to the end of the bottom section and strike at the top corner of the wall. |
| #2 |  |
Reach the top section of the last area and strike a few steps close. The item is hidden in mid-air, but the coming containers make it difficult to find. |
| #3 |  |
From #2, continue until the opening with the red arrow and strike at the space, it's roughly at the same height of the previous one. As before, containers in this area make this item hard to obtain. |
| #4 |  |
Strike right at the center of the opening from where the containers come from. A very difficult item to obtain as well. |
| #5 | |
From #4, drop down the path and strike at the space around that spot. Containers continue to be a high nuisance. |
| #6 | |
Strike at the space going left a few steps from #5. |
| Scene 5 Locations | ||
|---|---|---|
| Order | Hidden Item | Information |
| #1 |  |
From the middle, bent platform at the left side of the boss room, perform a double jump left and strike at the left-most space, above the red sign. |
| #2 | |
Same as above, only from the right side platform. |
Gallery[]
")
")
")
")
")
")
")
")